Italian biscottine cookies

Continuing the tradition of rediscovering and reinventing all the cookies that my grandmothers made here’s one of my favorites.  She called them ‘biscottines’ which I think really just meant ‘drop cookie’.  It’s a classic Italian anise flavored cookie.  Simple, light with just a little icing glaze.  If you don’t like anise flavoring, they can be adapted to other flavors as well.  I sometimes make them with lemon and they’re always a hit.  The anise are my favorites but alternate flavors are nice here and there just to mix things up.

Italian Biscottine Cookies

Ingredients

  • 1/2 cup unsalted butter
  • 1/4 cup shortening (Spectrum organic is best but Crisco works fine too)
  • 3/4 cup granulated sugar
  • 4 eggs
  • 3 cups all-purpose flour
  • 5 teaspoons baking powder
  • 1/2 teaspoons salt
  • 1 tablespoons anise extract (can use lemon extract instead)
  • 1/2 teaspoon vanilla extract
  • 2 cups confectioners sugar
  • 1 large organic lemon (only for lemon flavored option)
  • zest of above lemon (only for lemon flavored option)

Instructions

  1. Allow butter to come to room temperature - it should be as soft as the shortening. Cream the butter, shortening and sugar together. Add the eggs, one at a time, beating well after each addition. Mix in the anise extract (or lemon extract for alternate variety). Add the lemon zest if making lemon flavored variety. Mix well. Sift or whisk together flour, baking powder, and salt.
  2. Add to creamed mixture gradually mixing by hand. If the dough is too sticky to roll in the palm of your hand, add flour until firmer, but it should be very soft. Generally 15oz of flour total is just right.
  3. Roll dough into small balls (these tend to really puff up with all the baking powder in them!) and place on ungreased cookie sheets. I generally make the balls about 30g each. I weigh the dough and then divide by the number of cookies I want. The 30g size approximates grandma's version and makes about 32 cookies.
  4. Bake @ 375 degrees for ~10 minutes (the bottom should be lightly browned but the tops should remain light). Remove cookies to wire rack and cool completely before glazing.
  5. Once cookies have cooled completely, whisk together 2 cups confectioners' sugar, 3 tbsp water, and 1/4 tsp anise extract.* Dip the tops of each cookie into the glaze, and then sprinkle nonpareils over top. Let glaze harden completely before storing.
  6. *Use 3 tablespoons lemon juice in place of water and substitute equal quantity of lemon extract in place of anise extract.
http://geekworldliving.com/italian-biscottine-cookies/

Facebooktwittermail
Tagged with: , , , ,

Garden Book

Sorry, but you do not have permission to view this content.

Tagged with: , ,

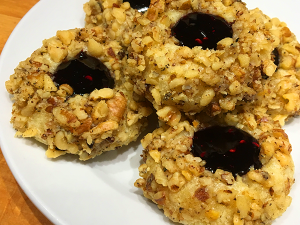
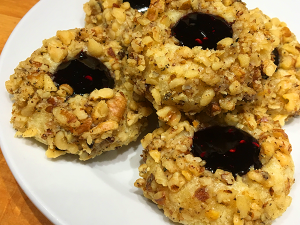
Italian Thumbprint Cookies

rp_IMG_1628_sm-1-300x225-1-300x225.pngThis recipe has been in my family almost as long as I’ve been alive. My mom started making them at Christmas when I was a little kid.  It’s a drop cookie that’s rolled in nuts with a little depression, made at the center with a finger or the handle of a wooden spoon, and then filled with jam.  Raspberry and blackberry are my favorites.

Originally, mom rolled them in walnuts but somewhere through the years it changed to pistachios.  Both options are good – it really just comes down to taste preference and price as walnuts around here, in the Midwest at least, are a bit cheaper than pistachios. Although the little specs of green with the pistachios are kind of cute if you don’t mind eating green food.


Italian Thumprint Cookies

Prep Time: 20 minutes

Cook Time: 12 minutes

Total Time: 35 minutes

Yield: 24 cookies

Ingredients

  • 3/4 cup sugar
  • 1 teaspoon salt
  • 3/4 cup softened butter
  • 2 egg yolks (reserve whites)
  • 1/2 teaspoon vanilla
  • 1/2 teaspoon almond extract
  • 2 cups flour
  • 1 to 1 1/2 cups of nuts (chopped walnuts or pistachios)
  • Jam -- any flavor (more intense flavors seem best

Instructions

  1. Combine sugar, salt, spices, butter and eggs (everything except the flour) and mix well for about 1 minute with an electric hand mixer.
  2. Gradually add flour blending on low speed or mixing by hand until fully incorporated.
  3. Portion dough into 1" balls.
  4. Beat the reserved egg whites slightly to give them a little volume.
  5. Roll the dough balls in the egg whites then roll them in the chopped nuts.
  6. Make a small depression in the middle of each dough ball before baking.
  7. Bake on a greased cookie sheet for 10-12 minutes until firm and light brown.
  8. Immediately remove cookies from cookie sheet and fill the center depressions with a small amount of jam.
  9. Allow jam to set before storing.
http://geekworldliving.com/italian-thumbprint-cookies/

Facebooktwittermail
Tagged with: , , , ,

Italian Nut Ball Cookies

IMG_1628_sm

This recipe has been in my family almost as long as I’ve been alive. My mom started making them at Christmas when I was a little kid.  It’s a drop cookie that is rolled in nuts with a little depression, made at the center with a finger or the back of a wooden spoon, and then filled with jam.  Raspberry and blackberry are my favorites.  Originally mom rolled them in walnuts but somewhere through the years it changed to pistachios.  Both options are good – it really just comes down to taste preference and price as walnuts around here, in the Midwest at least, are a bit cheaper than pistachios.  Although the little specs of green with the pistachios are kind of cute if you don’t mind eating green food.  😄

Ingredients
  • 3/4 cup sugar
  • 1 teaspoon salt
  • 3/4 cup softened butter
  • 2 egg yolks (reserve whites)
  • 1/2 teaspoon vanilla
  • 1/2 teaspoon almond extract
  • 2 cups flour
  • 1 to 1 1/2 cups of nuts (chopped walnuts or pistachios)
  • Jam — any flavor (more intense flavors seem best)
Instructions
  1. Combine sugar, salt, spices, butter and eggs (everything except the flour) and mix well for about 1 minute with an electric hand mixer.
  2. Gradually add flour blending on low speed or mixing by hand until fully incorporated.
  3. Portion dough into 1″ balls.
  4. Beat the reserved egg whites slightly to give them a little volume.
  5. Roll the dough balls in the egg whites then roll them in the chopped nuts.
  6. Make a small depression in the middle of each dough ball before baking.
  7. Bake on a greased cookie sheet for 10-12 minutes until firm and light brown.
  8. Immediately remove cookies from cookie sheet and fill the center depressions with a small amount of jam.
  9. Allow jam to set before storing.


Facebooktwittermail

SNVoice Single Chip Analog DIY Synth

I’ve been wanting to build a stand-alone analog synthesizer using the TI SN76477 integrated circuit since I was fourteen years old. Back in 1978 that’s when Texas Instruments released the “complex sound generator” that was used in the Space Invaders arcade gIMG_0900ames to make the sounds of ships, aliens, music and photon blasters. I bought my chip at Radio Shack and along with Forrest Mims’ III “Engineer’s Notebook”, also from Radio Shack.  I was able to breadboard a number of the demo circuits to make some interesting sound effects.  There were siren, helicopter, gunshot and organ circuit examples on the datasheet.

But beyond simple sound effects and organ tones created by using different resistor values to get the right voltages to generate musical “tonal” notes, building something as complicated as a monophonic analog synthesizer was beyond my skill as a newbie just learning about electronics.

So in 2006 when Thomas Henry developed and published in concert with Scott Stites a complete circuit that could play a five octave musical scale in addition to the wide variety of sounds the SN76477 chip was capable of, I knew I had to give it a try. I bought a bare circuit board in 2010 from Synthcube but never got around to buying the parts and populating it until this Spring. There were two issues.  I wasn’t sure how I wanted to use the circuit Build it as a module as one part of a larger moduluar synth or build it as a stand alone unit?  And also, I didn’t have a place to work.   So I had a puzzle to solve.

The answer came this Spring.  Working at Washington University, I learned about the Techshop – a makerspace chain that the University partners with. I took a tour and decided to join.  Part of what convinced me to join was seeing, the potential to complete a project like this because of how well outfitted it was.  The reason I hadn’t built the circuit when I bought the board was I didn’t have a place to safely solder.  With the Techshop, I had an electronics bay, woodshop, metalshop and more.

I began building the circuit in May and started to think about how I would build a case with a rescued keyboard and a panel similar to the ones used with the SNVOICE circuit but laid out in a stand-alone way rather than modular style.  I started making drawings and doing some research on legacy original analog synthesizers.

IMG_0902(click the image for a closer view)

Serendipitously, in June I learned that Techshop St. Louis was sponsoring a Maker Faire over the summer to celebrate its 1 year anniversary.  Members were offered a chance to earn three months additional membership by choosing a project that would make good use of the Techshop facilities and community and would commit to finishing it in time for a Maker’s Showcase.   I decided to commit to the case as my project.  It took about two months to design and build and I learned so much doing it, it felt like a great opportunity.

I chose an old school look to match other analog monophonic synths of the day.  The Moog MG-1 was probably the most influential being the Moog that was sold by Radio Shack and the one I had the most contact with.  To make the case I used basic materials.  The base of the case is made from plywood. Powder-coated aluminum sheet metal provides the substrate for the control panel. And solid pine side panels brings the base and control panel together. The keyboard was rescued from an old reed organ I found on Craigslist for 10 dollars.

Here’s the list of Techshop classes that were required to complete this project:

• Woodshop SBU: WOD101
• Jointer, Planer, Router SBU: WOD201
• Basic Metal Shop SBU: MTL103
• Angular Sheet Metal SBU: MTL105
• Laser Cutting and Etching SBU: LAS103
• Sand Blasting and Powder Coating SBU: FAB106

Now I’m ready to wire the board to the panel controls and test the circuit. I’ve been waiting for this day for decades now. I’m pretty excited.  I bought the electrical components from Mouser, Digikey, Tayda and Synthcube.  I added an MFOS keyboard controller and MFOS wall-wart power supply.  I’ll post an update here as well as sound samples once it’s up and running. Here are a few more pictures to round out this post:

IMG_0901

IMG_0893

IMG_0894

Facebooktwittermail
Tagged with: , , , , , ,

SYNTAX ZX80

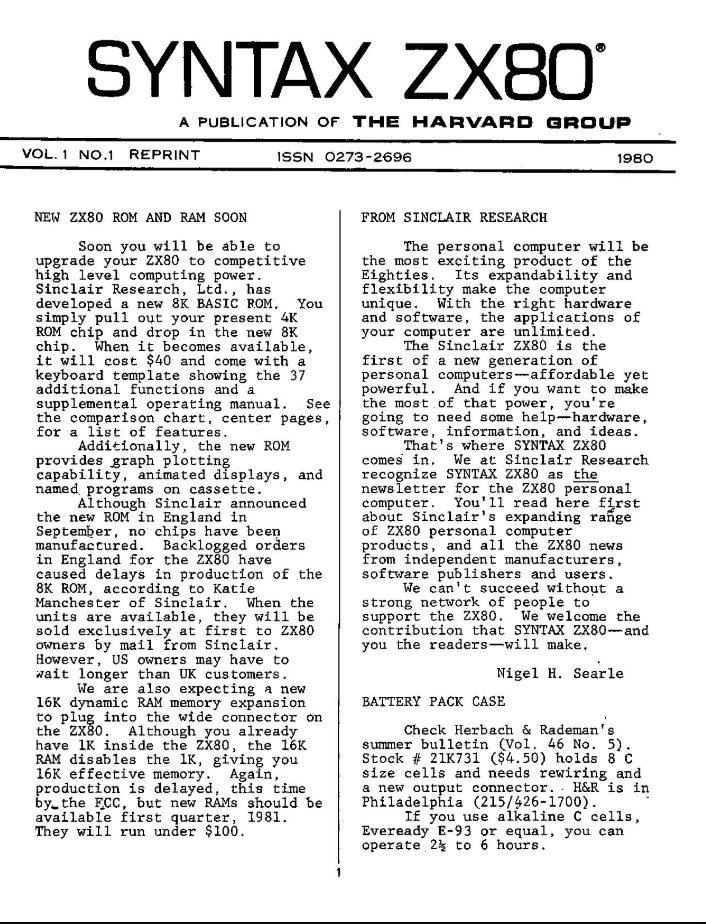
One of the first publications for the ZX80 was a newsletter called SYNTAX ZX80 published by Kirtland H. Olson of the Harvard Group. When I got my ZX80 there was a flyer about the publication packaged with the computer. But unfortunately, I had barely scraped together enough money to buy the computer itself so I couldn’t afford the subscription.

Now some 36 years later, I stumbled across a nearly complete set of these on ebay. It’s an amazing publication with a wide variety of content. It has reviews, announcements, how-to articles, troubleshooting tips, software listings, hardware projects, advertisements, classifieds and reader contributed material.

I bought the lot with the intention of scanning and digitizing them all and was super fortunate to have found the original publisher, Kirt Olson. I wrote him a letter and he responded by e-mail and gave me permission to scan and upload them to the Internet Archive. He’s also been very generous with his time and has scanned a few issues that I was missing from my collection.

So far, both issues of volume 1 and eleven of twelve issues of volume 2 have been scanned and are available with the rest to soon follow. To find them go to http://archive.org and search for “syntax zx80” or click this link: https://archive.org/search.php?query=syntax%20zx80

Another item published by the Harvard Group was a ZX80 4k ROM listing with annotations from the original ROM author. I haven’t located a copy yet but I have permission to scan and load it as well. It is an 8.5 x 11 inch, plastic spiral bound book, that’s approximately 100 or so pages long. It has dark yellow covers. If you have a copy you would be willing to sell or loan, please get in touch!

Facebooktwittermail
Tagged with: , , , ,

Homemade digestive tea biscuits

Homemade wholegrain digestive tea biscuits

Ingredients

  • 100g oats
  • 100g wholemeal flour
  • 1 tsp baking powder
  • 50g light soft brown sugar
  • Pinch salt
  • 100g salted butter, softened & cubed
  • 1-2 tbsp milk

Instructions

  1. Preheat oven to 180 degrees C. Blitz the oats to a fine powder in a blender then mix in a large bowl with the wholemeal flour, baking powder, brown sugar and salt.
  2. Add the butter and mix until crumbly. Add the milk and mix to form a smooth dough. Wrap in cling film and pop in fridge to firm up for about 15 minutes.
  3. Remove your dough from the fridge and roll out to around 3mm thickness. It will be very crumbly so you’ll need to be very careful when rolling. Cut out circles of about 6cm diameter – I used a water glass to stamp out the shapes. Decorate with a pattern of your choice then bake in the middle of your oven for about 15 minutes.
  4. When lightly golden but not too brown, remove from the oven and leave to cool on a wire rack. Store in an airtight container.
http://geekworldliving.com/homemade-digestive-tea-biscuits/

Facebooktwittermail

“Grandma’s” Cookies

"Grandma" cookies

Ingredients

  • 2 sticks of butter softened
  • 1 1/2 cups sugar
  • 3 eggs
  • 1 teaspoon vanilla extract
  • 1/2 teaspoon almond extract
  • 1/2 teaspoon orange extract
  • 3 cups of flour
  • 2 teaspoons baking powder

Instructions

  1. Using electric hand mixer cream the butter and sugar together.
  2. Add the eggs and mix together
  3. Add the vanilla and extracts and mix well.
  4. Sift the flour and baking powder and hand mix with the wet ingredients using spoon.
  5. Divide into sections (if dough is too sticky add a small amount of flour)
  6. Put sections on lightly floured plastic wrap and shape into 1 -1 1/2 inch high rectangular logs
  7. Refrigerate.
  8. Cut into small slices about 1/4 inch thick
  9. Pinch the middle to make a bowtie shape
  10. Using a fork press lines into both triangles of the bowtie.
  11. Place on ungreased cookie sheets and bake for 6-10 minutes at 375 degrees.
  12. Makes approximately 48 cookies.
http://geekworldliving.com/grandma-cookies/

Facebooktwittermail

Grandma’s Bran Muffins

Grandma's Bran Muffins

Ingredients

  • 1 cup flour
  • 1 cup bran
  • 1/4 cup sugar
  • 3 tablespoons shortening
  • 1 cup milk
  • 1 egg slightly
  • 3 teaspoons baking powder
  • 1/2 teaspoon salt

Instructions

  1. Mix dry ingredients together
  2. Add wet ingredients to dry and mix until just incorporated.
  3. Bake for 20 minutes at 400 degrees
http://geekworldliving.com/grandmas-bran-muffins/

Facebooktwittermail

Raisin Jumbo Cookies

Raisin Jumbo Cookies

Ingredients

  • 2 cups of raisins
  • 4 cups of flour
  • 1 teaspoon baking soda
  • 1/2 teaspoon nutmeg
  • 1 cup of shortening
  • 2 eggs slightly beaten
  • 1/2 cup nuts
  • 1 cup of water
  • 1 teaspoon baking powder
  • 1 teaspoon salt
  • 2 teaspoons cinnamon
  • 1 3/4 cups of sugar
  • 1 teaspoon vanilla

Instructions

  1. Bring raisins and water to a boil. Boil for 3 min then cool.
  2. Cream sugar and shortening.
  3. Add eggs and vanilla and mix well.
  4. Stir in raisins and water
  5. Add flour, baking powder and baking soda, cinnamon and nuts and mix until fully incorporated.
  6. Bake at 350 degrees for 10-12 minutes
http://geekworldliving.com/raisin-jumbo-cookies34e/

Facebooktwittermail
Top